***UPDATE: Patterns purchased between July 2015 -Januaray 2016 – need an additional pattern piece called B-Interfacing. You can download it here. ***
Welcome to day #2! Today we are going to work on the cupcake dome.
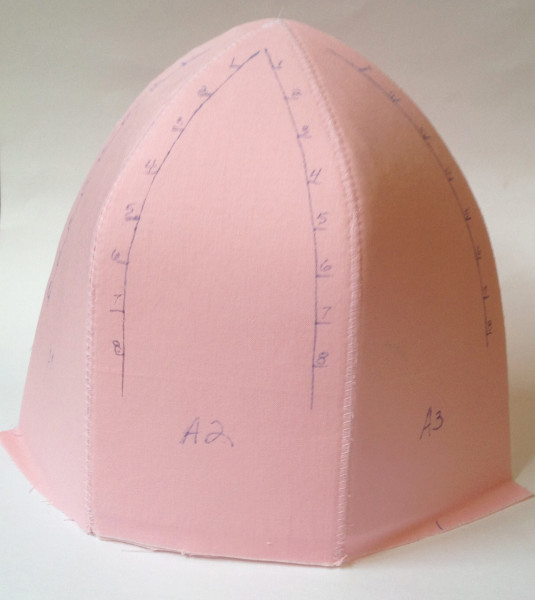
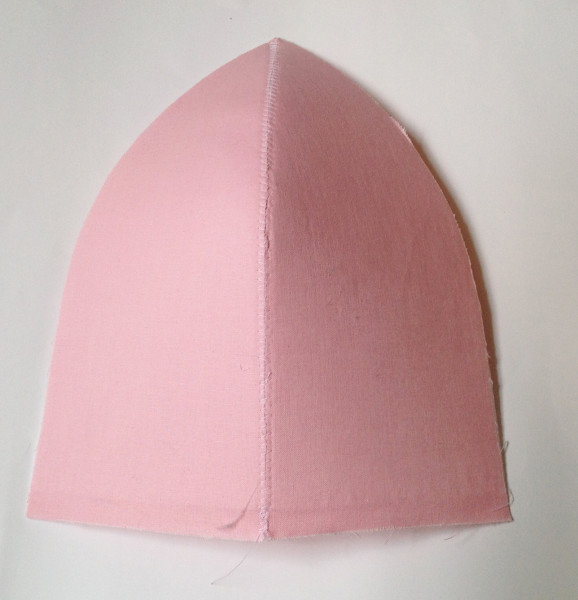
We will cover steps 9-13 from the pattern and will end up with this:
I know, it doesn’t look like much, but it brings us one step closer!
You will need these pieces: 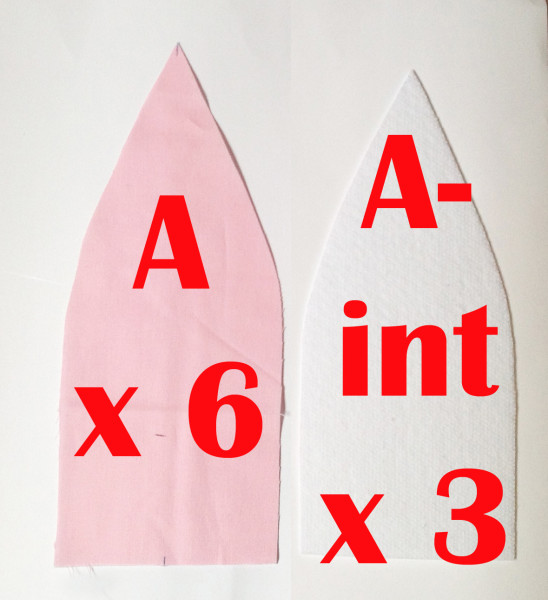 You will also need your Ruffle Placement Template.
Let’s make the cupcake dome!
By the way, in my attempt to sew, take and edit photos, and write this tutorial, all at the same time, I neglected to serge my pieces! So, a good number of my photos will show unfinished edges, Your pieces should be finished before you do these steps.
The first thing we need to do is measure the bottom edges of our A pieces. Be sure they are 4 3/8″ wide. It is really important that they are the right size if they are going to fit inside your wrapper easily.
Sandwich the A-interfacing between between two of your A panels. Be sure the right sides of your fabric pieces are facing out. There should be 1/2″ along the bottom edge without interfacing. Fuse them together on both sides ( you read the interfacing fusing instructions, right? I used to fuse all my interfacing with a rocket-hot iron and then wondered why I had problems with it!!). Repeat with the other 2 sets of A pieces and interfacing.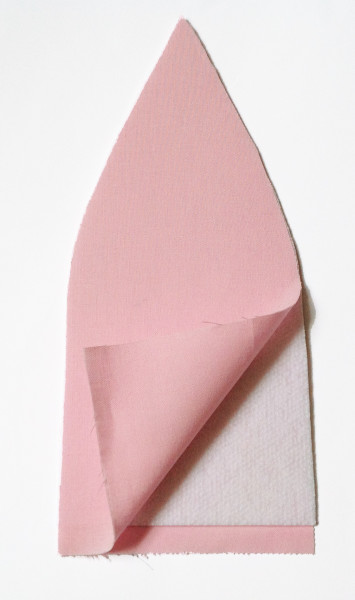
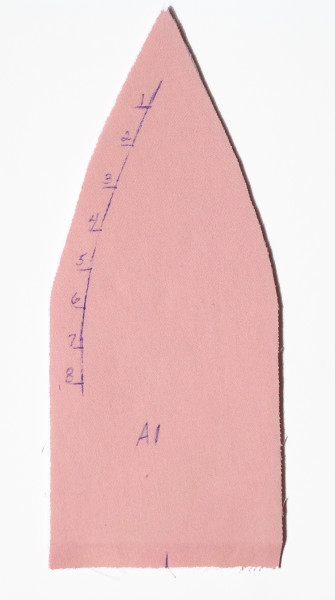
Now we are going to mark placement marks for where we will put the ruffle later on. Designate the A panels as A1, A2 & A3. Take your Ruffle Placement Template and lay it on the exterior side of A1. Be sure it is centered. 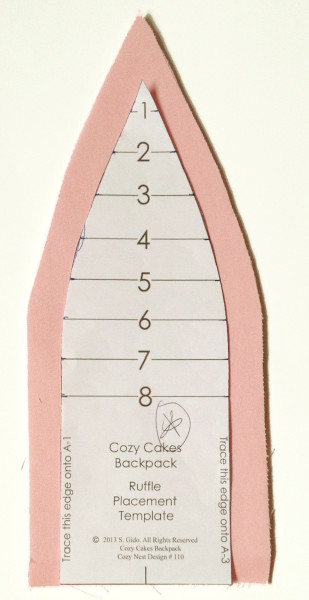
Trace the left edge. Then mark the numbered, horizontal lines on one (or both) sides of the template with a temporary making tool. Be sure that whatever you use to mark it can be removed from the fabric because this is the exterior of the backpack. It will look like this:
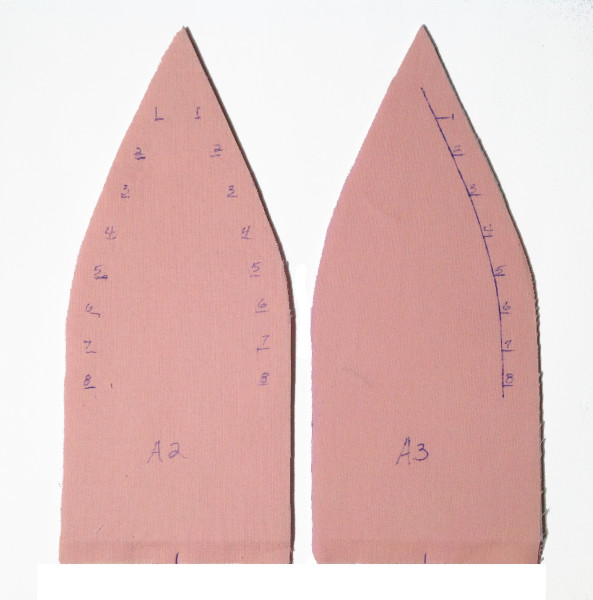
Now do panels A2 and A3. For A2, you don’t have to trace the sides edges of the Template, just transfer the numbered lines onto the fabric on both sides of the template. For A3, trace the right edge of the template and then transfer the numbered lines onto the fabric to the right of the template.
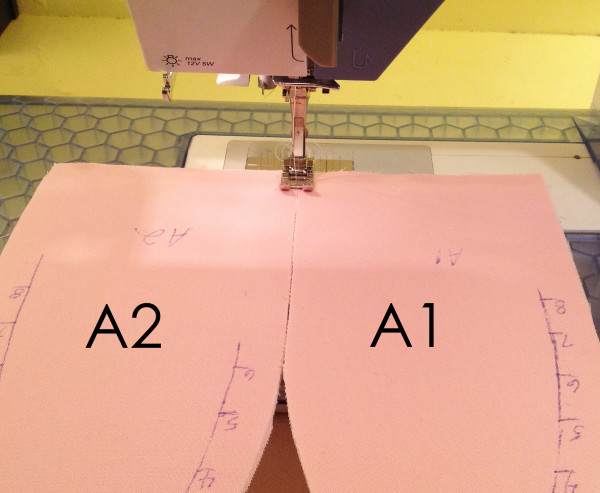
Now we are going to sew the panels together. We want to be sure that, once they are sewn, A1 ends up on the left, A2 in the middle and A3 on the right. So, put A1 and A2 under your presser foot like this:
Butt the edges up but don’t overlap them. Set your machine to a wide but short zig zag stitch. Sew the panels together and as you stitch continue to bring the edges together. A concave shape will start to form as you approach the ends. It should look like this from the wrong side when you are done.
Now we’ll attach A3. If find it easiest to turn the A1/A2 panel so that the blank side is concave and facing up under my machine. Be sure the blank side of A3 is also facing up. 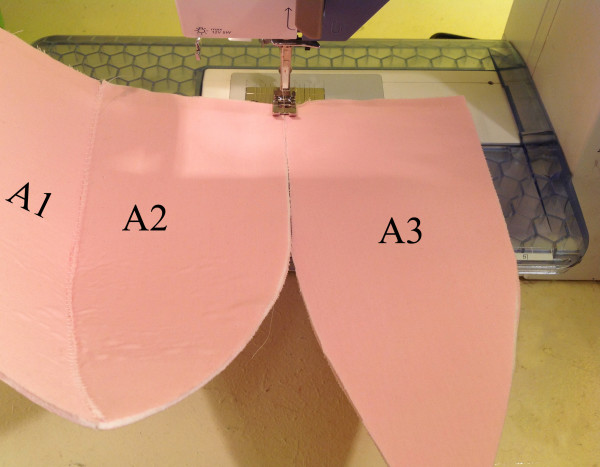
Once that’s done it should look like this on the exterior side.
Like I said, it doesn’t look like much! Tomorrow it will though! We will doing the ruffle frosting and attaching the bottom tomorrow. See you then! Sarah
Leave a Reply
You must be logged in to post a comment.